- Published on
Setup of a fullstack blockchain sanner using Supabase and Next.js
- Authors
- Name
- Shichang Ke
- Name
- Jiarui Chen


Introduction
This blog will walk through the setup of a simple blockchain scanner on the Ethereum blockchain. It provides a user-friendly interface for blockchain users, investors, developers, and regulators to analyze data and track activities.
Check out the demo first!
https://blockchain-db.netlify.app/
User Guide
To navigate through our web application: the user can click on the cards on the home page, each leading to a page presenting a table of relevant data.
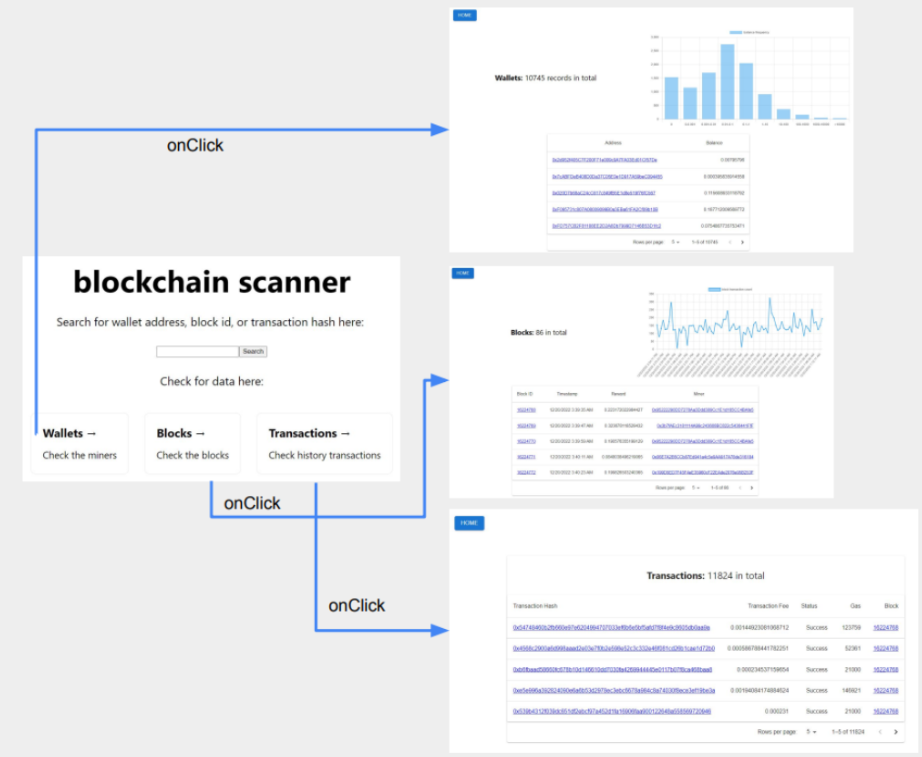
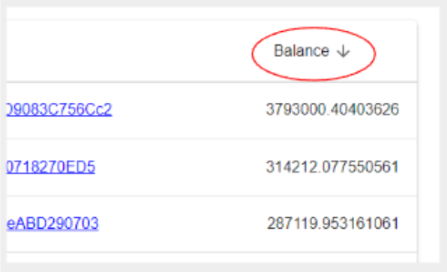
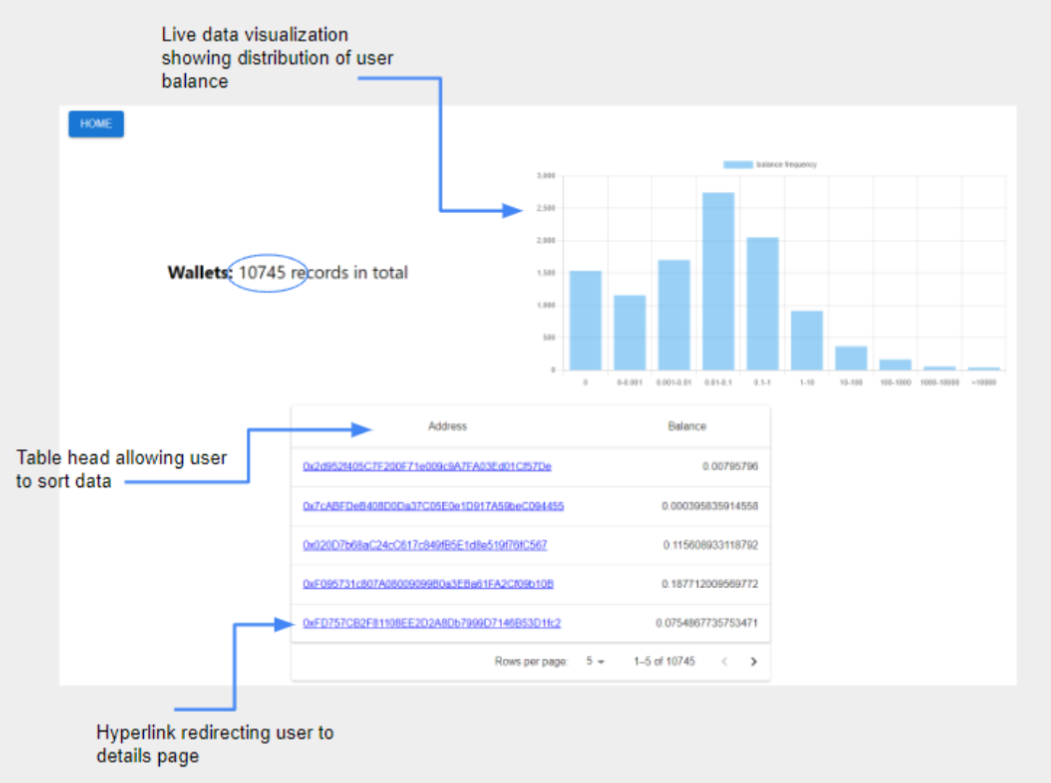
The user can click on the attributes of each table to sort the rows based on each attribute.
Then for each primary key and foreign key, the user can click on the hyperlink to see the details of that tuple as well.
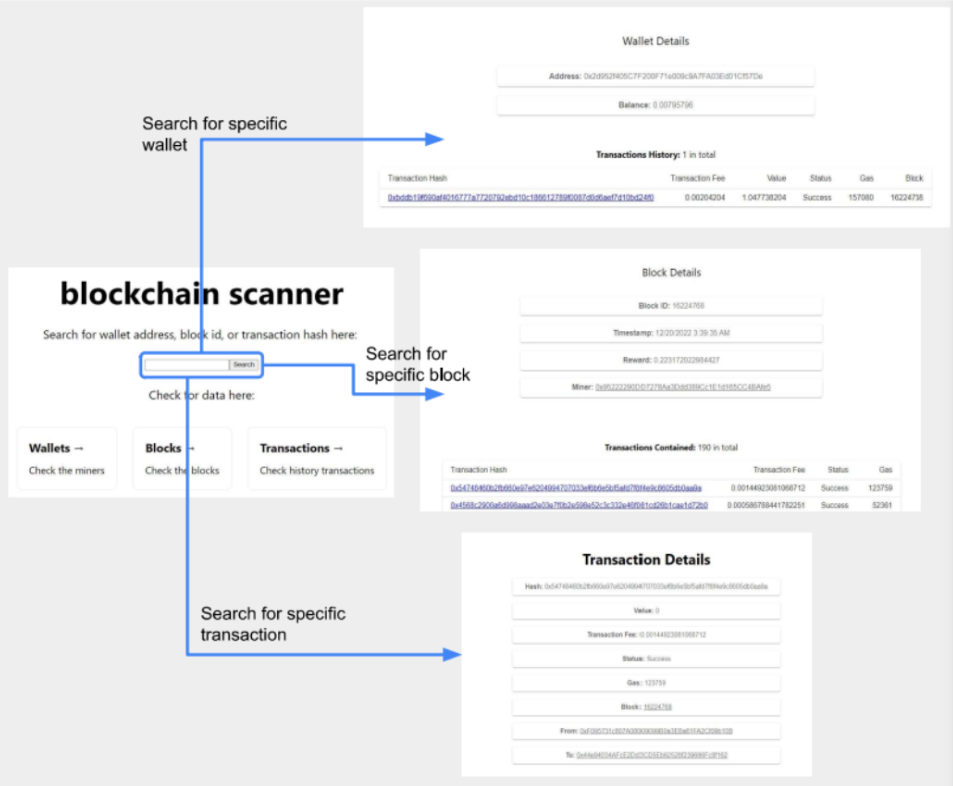
Alternatively, the user can choose to directly input transaction hash, wallet address, or blockID in the search bar at home page to see the details.
The application also provides an advanced GUI aided with data visualization for data analysis.
Getting Started
This is an example of how you may give instructions on setting up your project locally. To get a local copy up and running follow these simple example steps.
Installation
- Clone the repo
git clone https://github.com/gillKSC/blockchain-scanner.git - Navigate to the frontend directory
cd frontend - Install NPM packages
npm install
Configuring Supabase
Create an empty database on Supabase
Copy and paste the code from
create_table.sqlto the SQL editor on Supabase and run, now the schema is imported
The schema is designed as follows:
ER aiagram
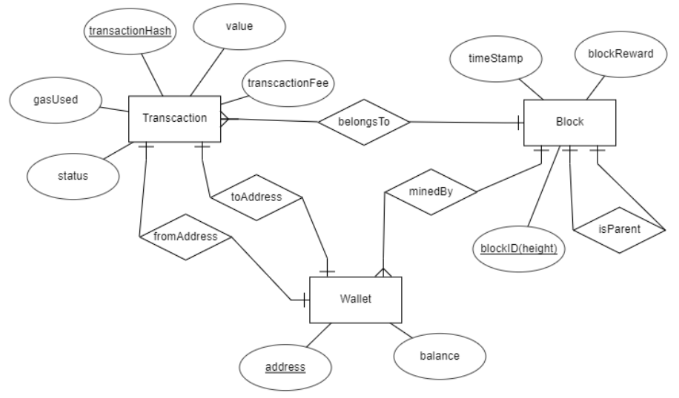
Relational table
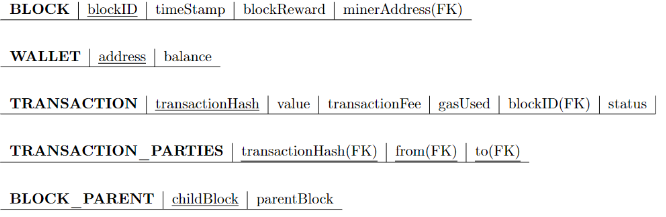
See `create_table.sql for relational table specification.
- Enter Supabase url and key in
frontend/.env.localNEXT_PUBLIC_SUPABASE_URL = 'ENTER YOUR SUPABASE URL' NEXT_PUBLIC_SUPABASE_ANON_KEY = 'ENTER YOUR SUPABASE KEY'
Loading the Data
To access the data stored on a blockchain network, we can run our own blockchain node or use the services of a company like Infura, which provides an API for accessing the node they run. We have written a JavaScript script that utilizes the Infura API and the web3.js library to retrieve data from the Ethereum blockchain and insert them into a SQL database. Batch data insertion is enabled in insert_data.js.
- Enter Supabase url and key in
./.env.localNODE_PROVIDER = 'ENTER YOUR WEB3 API HERE' DATABASE = 'ENTER YOUR SUPABASE URL' KEY = 'ENTER YOUR SUPABASE KEY' - Run
insert_data.jsnode insert_data.js
Now check the tables in Supabase, it should have data inserted now.
Run the application locally
- Navigate to the frontend directory
cd frontend - Run the app
npm run dev - Go to
http://localhost:3000/on your browser